- Dueling
- Class Updates
- Crafting Additions
- Monster Power Changes
- Monster Affix Changes
- Quality of Life Improvements

The Scorched Chapel: Dueling
As Jay discussed in his PvP update, patch 1.0.7 will introduce dueling, allowing players to test their mettle against fellow Nephalem. Here's a quick rundown of how dueling will work in Diablo III as well as some insight into our design philosophy for the system.
 How it Works:
- To duel another player, you’ll need to speak with Nek the Brawler at the inn in New Tristram
- Speaking with Nek will take you and your party to the Scorched Chapel, a new zone designed specifically for player combat
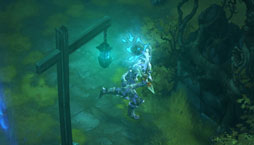
- This zone has custom geometry and features four different areas: the church, the graveyard, the river, and the lake
- Dueling currently supports up to four players in a Free-For-All format, which means you can battle your friends either one-on-one, three-player FFA, or a full four-player FFA
Our intent is to provide players a safe, opt-in location where they can fight one another for bragging rights (or maybe science) without the potential for griefing as it existed in Diablo II.
The game doesn't keep score and there are no objectives. We wanted dueling to be as simple and straightforward as possible, so we created a minimalist system -- we know that even without rewards and objectives, some players just want to beat each other up. Some matchups may be one-sided, and we don't expect that battles will be necessarily balanced. But that's okay, because dueling in Diablo III is more about kicking ass and taking names in a no-holds-barred sort of way, and this design certainly allows you to accomplish that.
Additional Info:
- If you die in the dueling world, you will be resurrected in the dueling zone
- Death is not permanent in the dueling zone, even for Hardcore characters
- You don't take any durability damage while in the dueling zone
- When you're done dueling you can take a portal out or use your Town Portal to return to town.

Stay Classy, Sanctuary
In terms of class balance, we focused on improving the Wizard and the Monk this patch.
 Wizard
The Wizard is seeing a damage buff to skills such as Arcane Orb, Blizzard, and Shock Pulse. We're also making other small changes such as allowing Illusionist to reset the cooldown of Slow Time and increasing the slow effect of Temporal Flux from 30% for 2 seconds to 60% for 3 seconds.
 Monk
Monk
The Monk is getting a big damage buff to all Spirit Spenders. One of the most common uses for Spirit is to recast Mantra of Conviction-Overawe for the 3 second bonus. While this is totally legitimate, we want to provide alternate uses for your extra Spirit. As a result, we are greatly buffing all the damage-dealing Spirit Spenders to try and provide an alternate use for your Spirit.
Although the Wizard and Monk are receiving the most changes this patch, that doesn't mean we feel the other classes are perfect. Other classes have received more substantial changes in previous patches, and we still have lots of ideas for the Barbarian, Demon Hunter, and Witch Doctor, but constantly changing class skills can often do more harm than good.

Item Hunting
One of the most common requests we get from players is that they'd like to find more items (through drops or crafting) that are as awesome as those that they can get from the Auction House. The Auction House has its advantages: you get to pick the exact stats that you want, it can be thrilling to find a bargain, and if you find a cool drop that your character can't use, the Auction House provides a way to earn gold to put toward an item you prefer. But it has some downsides. The biggest downside is that some players find it more rewarding to collect items from slain monsters or crafting.
Patch 1.0.5 and the Infernal Machine event were successful in this regard, particularly with the Hellfire Ring reward. The Hellfire Ring is account-bound, and all the reagents to make it are also account-bound. So, you can't just go to the Auction House and buy a ring that someone else had found or made—you have to farm the reagents and ultimately craft the Hellfire Ring yourself. And as you play through the event more, you have additional opportunities to roll new Hellfire Rings with potentially better stats (or stats that are more suited to your play style and needs).
 New Crafting Recipes
We feel like the Hellfire Ring was a good first step and would like to introduce more items like it. So, working off this design, in 1.0.7 we're adding a new set of Rare crafting recipes that will create account-bound gloves, pants, wrists, a chest piece, and an amulet.
These new items will have six affixes and feature a primary stat (Str, Dex, Int, Vit) that extends higher than what is currently available in the respective slots. The items will also require an account-bound crafting reagent called Demonic Essence, which drops from Elite monsters in Inferno. Much like the reagents in the Infernal Machine event, the chance of getting a Demonic Essence will increase at higher Monster Power levels. Currently we are planning for a 20% chance to drop at Monster Power 0, and each Monster Power will increase the chance of Demonic Essence dropping by 15% (MP1 will be 23%, MP2 will be 26.45%, etc. up to 80.91% at MP10). These are the numbers we’ll be going to PTR with and are subject to change.
The Archon Armor recipe (the chest piece) can be purchased from Squirt the Peddler for 1.5 million gold. The other plans will drop randomly in the world, but also have a 50% chance to drop off the following bosses when you have five stacks of Nephalem Valor:
- Skeleton King
- Spider Queen
- Maghda
- Zoltun Kulle
- Ghom
- Cydaea
- Rakanoth
- Izual
 New Gems: The Marquise
In addition to new items, we're also adding a new tier of gems for those who really want to push their character farther. The new tier is called "Marquise" and most of its stats are in line with the current gem progression.
We also took the opportunity to modify the Ruby effect in weapons. At the moment, the Critical Hit damage bonus provided by the Emerald is a clear choice for anybody looking to do more damage with their weapon. The new tier Ruby is a significant bump up that should make it the preferred choice for those who favor attack speed over Critical Hit chance, or for those who use skills which do not benefit as much from Critical Hit such as Sentry and Hydra.
Players often ask why their Sentry or Hydra doesn't inherit their Critical Hit Chance and Critical Hit Damage. The answer is that we want players to be able to build their characters in different ways, and we would rather Critical Hit Chance and Critical Hit Damage weren’t always automatically the right answer. While this is not something that will change overnight, "different stats for different builds" is a high-level design goal and introducing a very strong Ruby is a step in the right direction.
The current design is that these gems can be combined at the Jeweler for a substantial reagent and gold cost (3 Radiant Star gems, 20 million gold, and 1 Demonic Essence), and the designs will drop randomly from level 63 monsters around the world.

Monster Power Changes
Overall, we've been very happy with Monster Power. Players are playing at a variety of Monster Power levels and upping the challenge. Different builds are of varying effectiveness at different Monster Power levels and we’re seeing a lot of build diversity there.
We do think there are two clear areas where we can improve: making Monster Power available in Public Games, and increasing the XP bonuses for players in Inferno.
 Monster Power in Public Games
When the Monster Power system was first introduced, we were wary of making it available for Public Games for two reasons. One, we didn’t want to reduce the pool of games that players could be matched into. And two, we wanted to avoid the potential group tension that could occur if somebody joined a Public Game at a Monster Power level higher than what they’re ready for. (For example, you wouldn’t want a severely undergeared character to join your Monster Power 6 game and constantly die. That can be very hindering to an otherwise powerful group.)
What we realized is that 1) choosing a Public Game and ending up in a game by yourself, but at the Monster Power you want is still preferable than not being able to play in a Public Game at all, and 2) undergeared characters can pretty much roadblock groups in Inferno anyway (if they really want to). We feel that the damage we’re doing to public games by not supporting Monster Power is greater than the potential damage we’d be doing by increasing Public Game waiting times or exposing Monster Power groups to possible leechers.
So, in patch 1.0.7 we're going to be rolling out Monster Power support in public games. You need to have the Monster Power option enabled to use it, of course—same as for making private Monster Power games. Once the feature is enabled, you can choose a Public Game and set a desired Monster Power level from the dropdown. From there, the game will work to match you into a group with the same Monster Power level selected.
Experience Bonuses in Inferno
We're increasing the experience reward for playing on Monster Power levels 1-10 in 1.0.7. Before I go into what's changing, though, here’s a little note on design philosophy. . . .
People often ask what the intention of Monster Power is. Am I supposed to just turn the Monster Power up as high as I can until I die? No, not really. Just because you’re able to beat something doesn’t mean that it’s optimal. In fact, we think there’s a real risk that if the most efficient path for XP or item farming involves playing on the highest Monster Power setting available regardless of the gameplay experience, then the game might actually become a lot less fun for a lot of people.
To take an extreme example: What if we made every monster on Monster Power 10 worth 5000x more experience? In that case, killing even one monster in Monster Power 10 would be worth hours of play at Monster Power 1. But is that what’s best for the game? Players who are looking to be efficient would likely play on Monster Power 10, but they’d be forced into a smaller number of defensive builds. Many players are able to kill things on Monster Power 10 already, but it might require them to use a skill build they don’t enjoy as much and the game can start to feel extremely tedious as you spend a lot of time attacking a monster that takes forever to die. We don’t want to overly-incentivize players into that kind of play style, and making Monster Power 10 the most efficient would undoubtedly cause this to happen.
We believe that Diablo shines when you can spend the majority of your time slaughtering hordes of enemies and then having that punctuated by the occasional difficulty spike either in the form of a particularly challenging set of normal monsters (like an elite pack) or a boss. With that in mind, what we want to do with Monster Power is set the reward so that there are incentives for playing at a higher level, but not make the incentives so powerful that players feel like they need to make the game less enjoyable in order to achieve a faster reward rate.
In line with all of that, we’re currently planning to increase XP bonuses for Monster Power levels to the following values:
- MP 1: 25% (up from 10%)

- MP 2: 50% (up from 20%)
- MP 3: 80% (up from 30%)
- MP 4: 120%(up from 45%)
- MP 5: 165% (up from 60%)
- MP 6: 215% (up from 75%)
- MP 7: 275% (up from 95%)
- MP 8: 340% (up from 115%)
- MP 9: 420% (up from 135%
- MP 10: 510% (up from 160%)
These numbers are still being worked on. We're going to monitor how things play out on PTR and make adjustments as necessary.
Monster Changes
And speaking of monsters, we're making some changes to a few affixes this patch:
Reflects Damage
We've adjusted the Reflects Damage mechanic. Monsters with this affix will now pulse a damage reflection shield on and off. While the shield is down, the monster does not reflect damage. When the reflect shield is on, the monster will Reflect Damage the way it does now on live. The shield has a strong visual associated with it so you’ll know it is reflecting. (We’ve also made it so that pet damage is no longer reflected back to the player.)
Molten and Plagued
We've made changes to Molten and Plagued, too. Molten often feels like one of the more threatening ground-based damage effects, and Plagued feels a bit low. So, we’re reducing the damage from Molten packs and increasing the damage from Plagued.
Quality of Life Changes
Finally, we’re making some other quality of life improvements to the game that we hope you can all appreciate.
- We're removing the incrementing resurrection timer on consecutives deaths. With the removal of enrage timers in the previous patch and the emphasis on players selecting their level of challenge via the Monster Power system, long resurrection timers no longer serve a useful purpose. It will now be a flat 5 seconds in Softcore. (The resurrection timer in Hardcore remains unchanged. :D)
- We're also increasing the base pickup radius by a small amount. The intention here is to ensure that players who are actively trying to pick up a piece of gold are able to get it. The current radius felt just slightly too small, such that even when you ran quickly past a piece of gold on purpose, you would sometimes fail to pick it up. We still want a meaningful pickup radius to be a gearing choice, so the buff to the base pickup radius is modest. Many players may not even notice. For those who are very meticulous with health globes, the new radius is still small enough that you can avoid picking up a health globe in melee range if you so choose.